Saturday, 22 March 2008

Wine 0.9.58, Fedora 8 and Photoshop CS2

Wine 0.9.58 wss released a few hours ago and I couldn't wait for binary builds to hit the Fedora repositories. As it turns out, compiling WIne from source is a breeze.
  1. Download the source tarball from http://prdownloads.sourceforge.net/wine/wine-0.9.58.tar.bz2

  2. Untar
    tar -zxvf wine-0.9.58.tar.bz2

  3. Run wineinstaller !
    cd wine-0.9.58
    ./tools/wineinstall

  4. Wine will ask you whether you want to install as super user. Say yes and provide the root password when it prompts you. (Might take a while)

DOne ! The new release has so much hype around it specially since someone managed to get Photoshop CS3 working on the git version a couple of weeks ago. I don't have CS3 installer with me, so I decide to test wine using the next best thing - Photoshop CS2. Sure, CS2 is in the AppDB Gold list, so nothing magical here. But I have had no luck with the default versions of Wine that shipped with Fedora.

As it turns out, installation is a breeze as well. Just run wine Setup.exe Everything works without a hitch. Kudos to all wine developers and Google for pushing Photoshop support, I can finally have some fun with Photoshop on linux !


Tuesday, 18 March 2008

Configuring ATI cards for Compiz-fusion 0.7.3

ATI cards have always had problems with Compiz on Fedora 8 -- at least for me. I had to go without Compiz for several months on Fedora 8 before I finally found out how to configure the darn thing to work. So here's how I went about it. Hope it helps any other fellow Linux ATI owners.

Step 1 : Uninstall old version of ATI driver

  1. The latest version of the ATI driver for linux released by AMD is Version 8.3 released on March 5th. If you have an older version of the driver, run the following commands to uninstall it. (If you have a customized xorg.conf, make sure to back it up first. The uninstaller deletes the file)

    cd /usr/share/ati
    sudo ./fglrx-uninstall.sh


  2. Now the system is clean. Make sure you have got the latest driver package from ATI and switch to a virtual terminal by pressing Ctrl+Alt+Fx where x can be any number between 1 and 6.


  3. Put the system in runlevel 3 - the single user mode. (This is not really necessary. But I prefer this way since it enables me to restart X and all services without really rebooting)

    sudo init 3


  4. Run the installer

    chmod +x ati-driver-installer-8-3-x86.x86_64.run
    sudo ./ati-driver-installer-8-3-x86.x86_64.run


  5. Once the driver finishes installing. Regenerate xorg.conf

    sudo aticonfig --initial -f


  6. Change back to runlevel 5 to see whether the driver installed correctly.

    sudo init 5


  7. If you see the graphical logon screen, congratulations. The driver was installed correctly.
    Open a console window and type

    fglrxinfo


  8. Check whether the output is something similar to:
    display: :0.0 screen: 0
    OpenGL vendor string: ATI Technologies Inc.
    OpenGL renderer string: ATI Mobility Radeon X2300
    OpenGL version string: 2.1.7412 Release


Step 2 : xorg.conf modifications

  1. My favourite editor is vim and here's how to invoke vim to edit xorg.conf
    sudo vim /etc/X11/xorg.conf
    if you prefer to copy and paste, it's easier to invoke an editor like gedit or kwrite
    sudo gedit /etc/X11/xorg.conf &


  2. ServerLayout Section
    Add the following line
    Option "AIGLX" "true"


  3. Module Section
    Load "dri"
    Load "extmod"


  4. Device Section
    Option "DRI" "true"
    Option "XAANoOffScreenPixmaps" "true"


  5. ServerFlags Section
    Option "AIGLX" "on"


  6. Create two new sections as follows
    Section "DRI"
    Group 0
    Mode 0666
    EndSection

    Section "Extensions"
    Option "Composite" "enable"
    EndSection


  7. That's all the configuration required. Here's a full dump of my xorg.conf for your reference:
    Section "ServerLayout"
    Identifier "aticonfig-Layout[all]"
    Screen 0 "aticonfig-Screen[0]" 0 0
    Option "AIGLX" "true"
    EndSection

    Section "InputDevice"
    Identifier "Keyboard0"
    Driver "kbd"
    Option "XkbModel" "pc105"
    Option "XkbLayout" "gb"
    Option "XkbOptions" "altwin:super_win"
    EndSection

    Section "InputDevice"
    Identifier "Synaptics"
    Driver "synaptics"
    Option "Device" "/dev/input/mice"
    Option "Protocol" "auto-dev"
    Option "Emulate3Buttons" "yes"
    EndSection

    Section "Files"
    EndSection

    Section "Module"
    Load "dri"
    Load "extmod"
    EndSection

    Section "Monitor"
    Identifier "aticonfig-Monitor[0]"
    Option "VendorName" "ATI Proprietary Driver"
    Option "ModelName" "Generic Autodetecting Monitor"
    Option "DPMS" "true"
    EndSection

    Section "Device"
    Identifier "aticonfig-Device[0]"
    Driver "fglrx"
    Option "DRI" "true"
    Option "XAANoOffScreenPixmaps" "true"
    EndSection

    Section "Screen"
    Identifier "aticonfig-Screen[0]"
    Device "aticonfig-Device[0]"
    Monitor "aticonfig-Monitor[0]"
    DefaultDepth 24
    SubSection "Display"
    Viewport 0 0
    Depth 24
    EndSubSection
    EndSection

    Section "ServerFlags"
    Option "AIGLX" "on"
    EndSection

    Section "DRI"
    Group 0
    Mode 0666
    EndSection

    Section "Extensions"
    Option "Composite" "enable"
    EndSection


Step 3 : Install Compiz-fusion 0.7.3

  1. Before proceeding, make sure all older versions of Compiz have been removed from your system.
    sudo yum remove *compiz*


  2. Delete Compiz gconf settings
    rm -rf ~/.gconf/apps/compiz


  3. Install the Compiz YUM repository. (Thanks to leigh123 at FedoraForums.org http://forums.fedoraforum.org/forum/showthread.php?t=173317)
    sudo wget http://www.dfm.uninsubria.it/compiz/fusion/compiz-fusion.repo\ -O /etc/yum.repos.d/compiz-fusion.repo


  4. List out all your enabled repos
    sudo yum repolist


  5. Disable all repos except "fusion" repo while installing compiz. For example, if you only have fedora and livna repos enabled in addition to the fusion repo, this is how you would install compiz:
    sudo yum --disablerepo=fedora --disablerepo=livna install compiz-all \ fusion-icon-all compiz-fusion-plugins-unsupported compiz-bcop ccsm \ emerald-themes


  6. Now you should be able to run Compiz ! Start Compiz by running fusion-icon from the Applications > System Tools menu


  7. If Fusion-icon doesn't work. Try running compiz as follows
    LIBGL_ALWAYS_INDIRECT=1; compiz --replace ccp emerald


Important: Some updates cause the ATI OpenGL libraries to be replaced by Mesa libraries. If you see a white screen when running Compiz after a system update, simply run the ATI driver installer again and restart the X-server by pressing Ctrl+Alt+Backspace
Checkout some awesome Compiz effects :)


Monday, 17 March 2008

Installing KDE 4.0.2 on Fedora 8

[First published on Dasun's blog http://lokuhetty.blogspot.com]
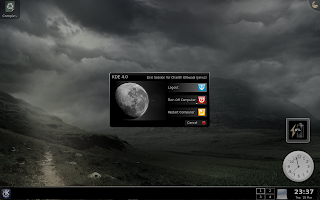
This guide illustrates how to compile and setup KDE 4.0.2 Stable release on a Fedora 8 Werewolf desktop. For instructions on building the latest version from trunk, refer to the official KDE Techbase article at http://techbase.kde.org/Getting_Started/Build/KDE4 and Go2Linux forum guide at http://www.go2linux.org/forums/how-to-install-kde-4-on-fedora-t-8.html. Some of the steps in this guide are taken from the above sources and credit should go to respective authors.

Step 1 : Getting the sources

  1. Create the directories for the KDE install. I chose to setup KDE in the /opt directory.

    su -c "mkdir -p /opt/kde4/kde/src"

  2. Give full access to the kde4 directory temporarily

    su -c "chmod 777 /opt/kde4"

  3. Download the KDE 4.0.2 source tarballs from http://kde.org/download/ to /opt/kde4/kde/src

  4. The required tarballs for a basic install are :

    http://download.kde.org/stable/4.0.2/src/kdelibs-4.0.2.tar.bz2
    http://download.kde.org/stable/4.0.2/src/kdepimlibs-4.0.2.tar.bz2
    http://download.kde.org/stable/4.0.2/src/kdebase-runtime-4.0.2.tar.bz2
    http://download.kde.org/stable/4.0.2/src/kdebase-4.0.2.tar.bz2
    http://download.kde.org/stable/4.0.2/src/kdebase-workspace-4.0.2.tar.bz2

  5. Extract the tarballs

    for i in *.bz2; do tar -jxvf $i ; done


  6. If you're a neat freak like me, get rid of the tarballs to make it look pretty :)

    mkdir tarballs && mv *.bz2 tarballs


Step 2 : Setting up the environment

  1. Copy the sample .bashrc file from http://techbase.kde.org/index.php?title=Getting_Started/Increased_Productivity_in_KDE4_with_Scripts/.bashrc and append it to your existing .bashrc

  2. We need to make some changes to the .bashrc to reflect the directory structure we require. In the KDE section, change the KDEDIR as follows:

    export KDEDIR=/opt/kde4

    Comment out the Qt section entirely. We are not building Qt from source.

    #export QTDIR=$HOME/qt-copy
    #export QT_PLUGIN_PATH=$KDEDIR/lib/kde4/plugins:$QT_PLUGIN_PATH
    #export PKG_CONFIG_PATH=$QTDIR/lib/pkgconfig:$PKG_CONFIG_PATH


    Assuming you didn't have anything in .bashrc before you copied over the .bashrc from KDE.org, scroll down to line 52 and make the following changes.

    export KDE_BUILD=/opt/kde4/kde/build
    export KDE_SRC=/opt/kde4/kde/src


    Save changes and exit.

  3. Source the new .bashrc

    source .bashrc


  4. Now lets install some of the prerequisite packages.

    sudo yum install clucene-core-devel libxml-devel libxslt-devel \
    dbus-devel boost-devel bzip2-devel openssl-devel alsa-lib-devel \
    redland-devel rasqal-devel raptor-devel hspell-devel aspell-devel \
    cups-devel xine-lib-devel avahi-devel gamin-devel OpenEXR-devel \
    enchant-devel jasper-devel ilmbase-devel pcre-devel gpgme-devel \
    libxklavier-devel glib-devel libusb-devel libsmbclient-devel \
    libxcb-devel NetworkManager-devel lm_sensors-devel libraw1394-devel \
    bluez-libs-devel gcc-c++ libXext-devel cmake subversion giflib-devel \
    libpng-devel libXdamage-devel libXcomposite-devel libXrender-devel \
    fontconfig-devel libXft-devel libXcursor-devel libXfixes-devel \
    ruby-devel libXScrnSaver-devel libkdcraw-devel exiv2-devel \
    lcms-devel libtiff-devel sqlite-devel libxkbfile-devel \
    imlib2-devel patch gstreamer-plugins-base-devel

    sudo yum install strigi strigi-devel

    sudo yum install qt4-devel qt4-doc

    sudo yum install blitz blitz-devel qimageblitz qimageblitz-devel


Step 3 : Build..build..build.
  1. Finally it's time to build everything. The magic command is cmakekde. I illustrate the process below for kdelibs.

    cd /opt/kde4/kde/src/kdelibs-4.0.2
    cmakekde

  2. You need to repeat the above process in the following order:

    kdelibs-4.0.2
    kdepimlibs-4.0.2
    kdebase-runtime-4.0.2
    kdebase-4.0.2
    kdebase-workspace-4.0.2

    If you're building other packages, the process is the same and the order does not matter.

  3. Expect to spend about 1 to 2 hours to compile only the basic packages. (Depends on the speed of your computer)


Step 4 : Setup a new session

  1. Assuming the build process went without any glitches, it is time to setup KDE4 as a login session.

    su -c "cp /opt/kde4/share/apps/kdm/sessions/kde.desktop /usr/share/xsessions/kde4.desktop"


  2. If you have an older version of KDE on your machine, to avoid confusion do the following change to /usr/share/xsessions/kde4.desktop

    NAME=KDE4


  3. Now you're all set. Logout from the current session and login again, but this time select "KDE4" as your session.


Trivia

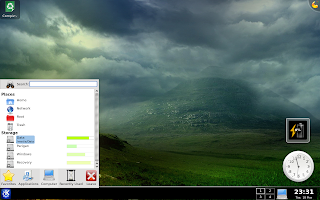
  • Maybe it's me, but I couldn't find a link to the control center on the Kickoff menu. If you have the same problem, do the following:

    Press Alt+F2 and type "system-settings" without the quotes and press enter.


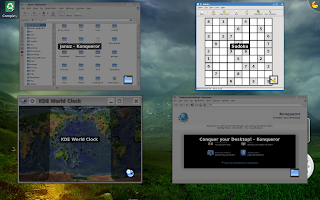
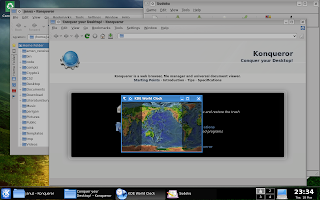
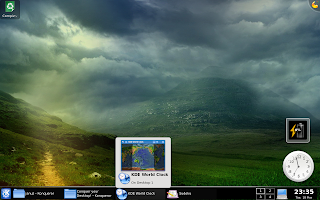
  • KDE4 has some cool Compiz like effects. Be sure to enable visual effects to see them in action. Some key combinations to try are Ctrl+F8, Ctril+F9, Ctrl+F10


  • Some mouse gestures also work. For example, move your mouse over to the top left corner to get a Mac Expo like effect. I am sure there are many more, but this should be enough to get you started. Have fun !


Screenshots